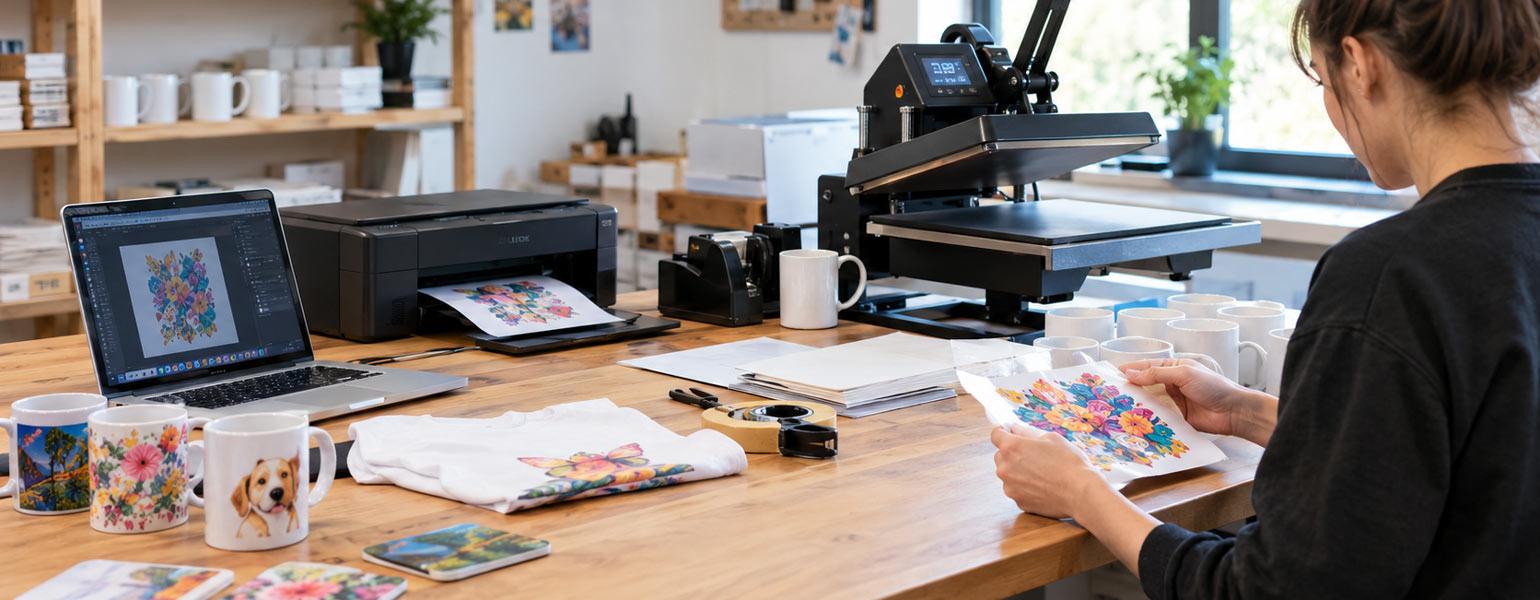
Everyone has their own way of working.
One person likes to prepare all the artwork first thing in the morning. Another prefers to print an order as soon as it comes in and press it straight away. Some people keep their blanks stacked beside the heat press, while others have everything stored away until it is needed.
There is nothing wrong with having your own habits. In fact, once you have been running a sublimation business for a while, you will naturally develop a way of working that suits you.
The problem comes when a personal routine becomes an inconsistent production process.
For a small sublimation business in the UK, there is usually a lot happening at the same time. You might be answering an Etsy message, preparing a personalised mug, checking tomorrow’s orders, printing a batch of transfers and wondering why the last coaster came out slightly darker than the previous one.
That is when a sensible sublimation workflow becomes much more than a matter of organisation.
A good workflow saves time, reduces wasted blanks and paper, makes quality more consistent and, perhaps most importantly, makes it easier to understand where something went wrong when a finished product is not quite right.
The aim is not to turn a small creative business into a factory. It is to make the work predictable enough that you can spend more time producing and less time fixing avoidable mistakes.
What a Good Sublimation Workflow Should Look Like
A practical workflow for a small UK sublimation studio can be broken down into these stages:
Order received → order checked → artwork prepared → artwork checked → transfer printed → blank prepared → design positioned → heat pressed → quality checked → packed → order dispatched
That sounds straightforward, but the important part is what happens between those stages.
For example, printing a design before checking whether the customer’s name is spelt correctly is not really saving time. Neither is pressing a mug before checking that the transfer is positioned correctly.
A good workflow puts a small quality-control point before every stage where a mistake becomes expensive.
That principle is worth remembering throughout the entire production process:
Check it before you commit time, ink, paper or a blank to it.
This becomes particularly important as order volumes increase. Making one faulty mug is annoying. Making twenty faulty mugs because the same incorrect setting was used across an entire batch is a different problem.
Phase 1: Check the Order Before Opening Your Design Software
It is tempting to jump straight into the artwork when an order arrives, especially when the customer has sent a clear design.
Resist that temptation.
Start with the order itself.
Check:
- Product type
- Quantity
- Blank colour and size
- Personalisation
- Spelling of names
- Dates and numbers
- Artwork supplied by the customer
- Required delivery date
- Any special instructions
For personalised products, this is particularly important.
Imagine receiving an order for ten mugs with ten different names. You create all ten designs, print everything and only then notice that one of the names was misspelt in the original message.
Now you have wasted a sheet of sublimation paper and ink. If you have already pressed the mug, you may have wasted the blank as well.
Important: Separate customer approval from production
If an order involves artwork that the customer has supplied or requested changes to, get confirmation before producing the final version.
A few minutes spent confirming a design is considerably cheaper than remaking a finished product.
For regular products with standard artwork, this process can be simplified. You may already have approved templates for your best-selling mugs, coasters or cushion covers.
That is where a small business starts to become much more efficient.
Phase 2: Prepare the Artwork Properly
Once the order has been checked, move on to the design.
The artwork needs to match the product rather than simply look good on a computer screen.
Check the dimensions against the actual printable area of the blank. A mug template, for example, may have a printable area that is smaller than the physical surface of the mug. A coaster may have rounded corners or a border that needs to be taken into account.
Templates are useful here because they remove some of the guesswork. Several UK sublimation suppliers recommend using product-specific templates or allowing an appropriate bleed when preparing artwork.
For personalised work, keep your editable master file separate from the final production file. That way, if another customer orders the same design with a different name, you are not rebuilding everything from scratch.
Check the image quality
Do not wait until after printing to discover that a customer’s photograph is too small.
A low-resolution image may look perfectly acceptable on a phone but become noticeably soft when enlarged for a larger sublimation product.
This is also a good point to check colours, cropping and alignment.
If something looks wrong on screen, stop there.
Do not tell yourself that the heat press will somehow make it better.
It won’t.
Phase 3: Keep Your Colour Workflow Consistent
Colour is one of the areas where a small sublimation business can waste a surprising amount of time.
A design may look one way on your monitor, another way on the printed transfer and slightly different again after pressing.
That does not necessarily mean your printer is faulty.
Your printer, sublimation ink, paper, colour-management settings and blank all influence the final result. An ICC profile can help manage colour reproduction for a particular combination of printer, ink and paper, which is why UK sublimation suppliers commonly recommend using the appropriate profile rather than treating colour settings as guesswork.
The key is consistency.
If you have established a reliable combination of:
- Printer
- Sublimation ink
- Sublimation paper
- ICC profile
- Printer settings
- Design software
Avoid changing several of those variables at once.
This is one of the easiest mistakes for a beginner to make.
A print looks slightly too dark, so the ink setting is changed. The next print looks better, but then a different paper is used. The colour changes again, so the heat press temperature is adjusted.
Eventually, there are three or four different changes in the workflow, and nobody knows which one actually fixed the problem.
A more controlled approach is much simpler: change one variable, test it and record the result.
Important: Your colour workflow should be repeatable, not improvised for every order.
Phase 4: Print the Transfer
Once the artwork is approved and the settings are correct, print the transfer.
This is another stage where rushing can cause unnecessary problems.
Use the correct sublimation paper for your printer and application. Ordinary inkjet paper is not a substitute for sublimation paper, and different sublimation papers can behave differently depending on the application.
Make sure the artwork is mirrored where the particular substrate and process require it.
This is especially important for text.
Nobody wants to produce a beautifully pressed mug only to discover that the customer’s name is backwards.
Before starting a larger batch, check the first printed sheet.
Look at:
- Overall colour
- Fine details
- Text
- Image orientation
- Cropping
- Print position
- Obvious banding or printer problems
If something is wrong, fix it now.
Do not print fifty copies and hope the problem disappears.
A useful small-business habit
For regular products, keep a simple production record.
It does not need to be complicated. A note containing the printer settings, paper, ICC profile and successful press settings for each major product can save a lot of time later.
You are effectively building your own production library.
Phase 5: Prepare the Blank Before Pressing
While the printer is working, prepare the products.
This is where a small studio can gain quite a bit of efficiency.
Rather than constantly moving between your computer, printer, storage shelves and heat press, prepare the next stage while the previous one is running.
Take the blanks out, inspect them and clean the printable surface.
For fabrics and other products where loose fibres or dust can become trapped beneath the transfer, a lint roller is a simple but useful part of the preparation process. A clean working surface matters too. Dust, fibres and other debris can leave marks in a sublimated image.
Check the blank itself before using it.
Look for:
- Scratches
- Damaged coating
- Chips
- Dirt
- Uneven surfaces
- Manufacturing defects
This is particularly important when producing customer orders.
If a blank already has a visible defect, there is little point in putting a perfect transfer onto it.
Important: Inspect the blank before pressing, not after.
Phase 6: Position the Transfer Carefully
Now the production becomes physical.
Place the printed transfer on the blank and position it carefully.
Use heat-resistant tape where appropriate to prevent the transfer from moving during pressing.
This matters because even a very small movement can create ghosting or a blurred edge. On products with text or sharp graphics, the problem can be particularly obvious.
Take an extra few seconds here.
A rushed positioning job can waste several minutes of previous work.
For repeat products, this is another area where templates and simple positioning guides can help. Once you know exactly where the design should sit, you should not have to measure it from scratch every time.
Phase 7: Use the Correct Heat Press Settings
There is no universal sublimation setting that works perfectly for every product.
This is one of the most important points for anyone starting a sublimation business.
A mug, coaster, polyester garment and coated metal panel can require different combinations of temperature, time and pressure. The manufacturer’s instructions for the particular blank should be your starting point.
The heat press itself also needs to be consistent.
If one part of the platen is producing a different result from another, changing the artwork will not solve the underlying problem.
Keep your settings recorded for your regular products and avoid changing them without a reason.
Temperature, time and pressure work together. Treating them as independent numbers that can be changed randomly is a common route to inconsistent results.
Do not chase problems with the heat press
Suppose a print looks pale.
It is tempting to think:
More heat must fix it.
Not necessarily.
The problem could be the paper, ink, ICC profile, blank, pressure, temperature or pressing time.
That is why troubleshooting should work backwards through the workflow rather than immediately turning the temperature up.
Phase 8: Inspect the Finished Product Immediately
Once the press cycle is complete, check the product.
Do not automatically put it into the packaging pile.
Look for:
- Faded areas
- Uneven colour
- Ghosting
- White spots
- Dust marks
- Poor alignment
- Missing detail
- Uneven transfer
- Damage to the blank
If something has gone wrong, you want to discover it while the job is still on the bench.
For some products, an immediate check can also help you determine whether a problem may be recoverable. However, repressing should not become a standard solution for every poor result. If the underlying cause is unknown, repeated pressing can simply waste more time or damage the product.
A good quality check is therefore not just:
Does it look okay?
It is:
Does it look the way this product is supposed to look, based on a result I have already tested and approved?
That is a much more useful standard.
Phase 9: Pack and Record the Order
Once the product has passed inspection, pack it.
Packaging is still part of the production workflow, even though the printing itself is finished.
Make sure the correct item is going into the correct order. This sounds obvious, but when several personalised products are being produced at once, it is surprisingly easy to put the wrong mug into the wrong box.
For larger batches, keep orders physically separated.
One simple approach is to give each order its own tray, box or clearly marked work area. The transfer, blank, finished product and packaging can then stay together.
This prevents the classic small-business problem of looking at a table covered in twenty identical mugs and wondering which one belongs to which customer.
What You Should Never Do in a Sublimation Workflow
A few shortcuts are simply not worth taking.
Never press before checking the artwork
A spelling mistake costs almost nothing to fix on screen.
A spelling mistake on a finished mug costs considerably more.
Never assume one press setting works for everything
Different substrates behave differently.
Use the recommended settings for the specific blank and build your own tested production notes over time.
Never change several variables at once when troubleshooting
If you change the paper, ink settings, ICC profile and heat press temperature simultaneously, you will not know which change affected the result.
Change one thing at a time.
Never use ordinary printer paper as a substitute for sublimation paper
The two materials perform different jobs. Sublimation paper is specifically designed to work with sublimation ink and the heat-transfer process.
Never skip the mirror setting when the product requires it
This is an easy mistake to make when you are in a hurry.
Always check the artwork orientation before sending the job to the printer.
Never press a dirty or dusty blank
A tiny fibre can become a very visible defect after pressing.
Clean the working area and prepare the substrate properly.
Never rely on memory for important production settings
You might remember how you made a particular mug three months ago.
You might also remember it incorrectly.
Write it down.
Never use customer products as your test pieces
If you are trying a new paper, ink, blank or press setting, use a test product first.
Testing on a customer’s order is an unnecessarily expensive way to learn.
Never keep changing a successful setup without a reason
There is always a temptation to try a new paper, new ink or new colour setting because someone online says it produces better results.
Experimentation is useful, but not when you have a queue of paid orders waiting.
Keep your proven production setup stable and experiment separately.
Build the Workflow Around Your Best-Selling Products
A small sublimation business does not need to treat every product as a completely new production process.
If mugs are your main product, develop a reliable mug workflow.
If you mainly sell coasters, photo panels and polyester clothing, create tested processes for those products instead.
The goal is to turn repeated work into a routine.
For example, once you have established the correct settings for a particular mug blank, paper and ink combination, there is little reason to reinvent the process for every order.
This is where efficiency starts to translate into profit.
Suppose one order takes ten minutes longer than necessary because you repeatedly search for settings, resize artwork, look for tape or clean the workbench halfway through production.
That may not seem significant.
Multiply those ten minutes across dozens of orders, and the number becomes much more meaningful.
The same applies to mistakes.
Saving 20p on a sheet of paper means very little if poor production control causes you to remake an entire £10 or £15 product.
For a small business, consistency is often more valuable than squeezing every last penny out of the cost of materials.
The Real Benefit of a Good Sublimation Workflow
A good workflow starts to pay for itself in the small things. You spend less time correcting artwork, looking for settings or wondering why one mug looks different from the next. Materials are less likely to be wasted, and when something does go wrong, you have a much better idea of where to look.
That becomes increasingly important as orders pick up. When you are making a few products a week, an inefficient process is easy to overlook. Once you are producing several batches in a day, those little delays and mistakes quickly add up.
There will always be individual preferences. One printer might prefer one paper, another operator might have a slightly different way of positioning a transfer, and every workshop will have its own layout.
That is perfectly normal. What matters is that the important parts of the process remain consistent: check before printing, prepare before pressing, inspect before packing, and keep a record of the settings that work.
For a small sublimation business, that kind of consistency makes it much easier to take on more orders without turning every busy day into a rush to fix problems.
If you are building or improving your own setup, having dependable sublimation paper, heat presses, blanks, cutters and other heat-transfer supplies makes the workflow easier to keep consistent. Signzworld supplies equipment, blanks and consumables for UK heat-transfer businesses, giving small studios a practical place to source the core products they use every day.