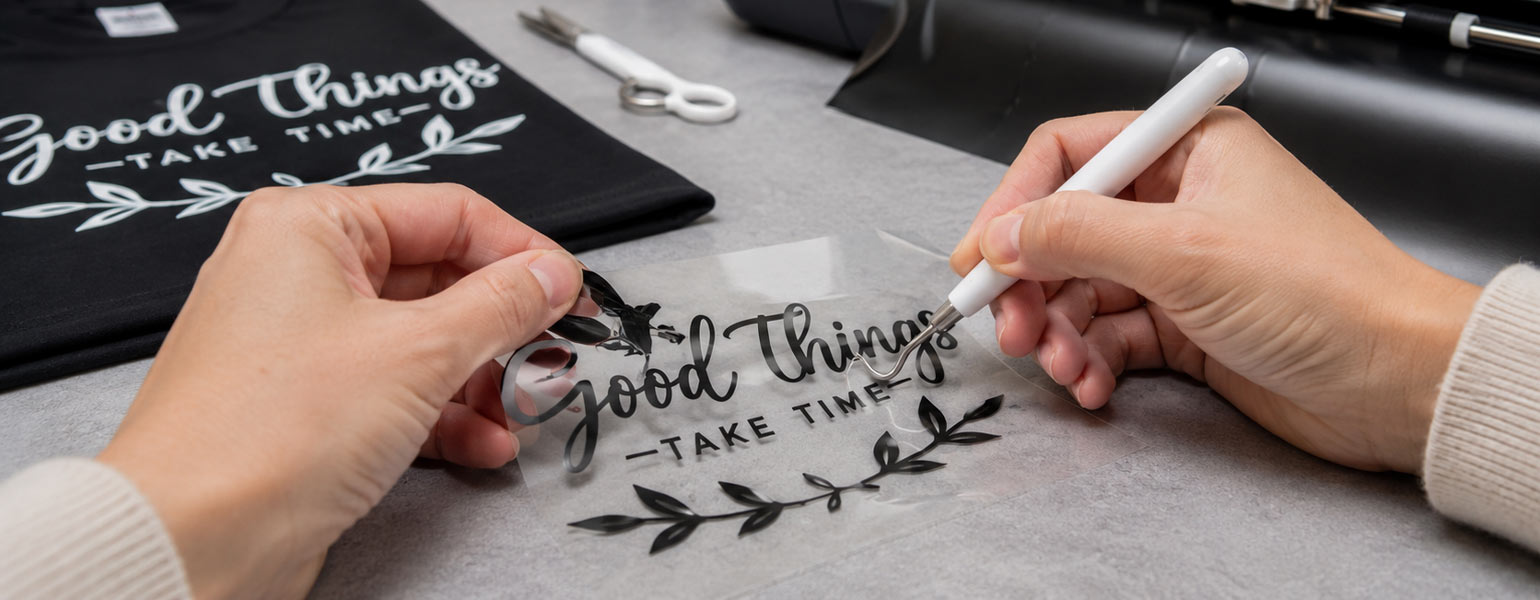
Modern vinyl designs can be incredibly detailed. Tiny lettering, delicate outlines and those long, trailing flourishes can make a T-shirt or hoodie look fantastic.
Then you have to weed the thing.
That is usually when the fun stops.
I have had designs that took less than a minute to cut but somehow took twenty minutes to weed. On the screen, everything looked perfectly fine. Once it was cut into HTV, those tiny letters suddenly seemed far too close together, a thin line kept lifting with the waste vinyl, and one small section eventually tore just when I thought I was finished.
It is incredibly frustrating. Especially when you have already spent time preparing the artwork and the vinyl is now destined for the bin.
The good news is that tiny designs can be made much easier to weed. A few small changes to the way you prepare, cut and handle the vinyl can make a surprising difference. And, perhaps more importantly, the cutter plotter itself plays a much bigger part in the process than people sometimes realise.
Why Tiny Designs Can Be Such a Pain to Weed
Weeding a large, simple design is usually quite straightforward. You find a corner, lift the unwanted vinyl and peel it away.
Tiny designs are much less forgiving.
Small text is a good example. The strokes are narrow, the gaps between letters can be almost impossible to see, and there is often very little vinyl for your weeding tool to grab. Pull a little too hard, and you might lift part of a letter along with the waste.
Fine decorative lines can be even worse.
Those little flourishes and trailing elements that look so elegant on the computer screen can become incredibly delicate once they have been cut. If the cut is not clean enough, the line may remain partially attached to the surrounding vinyl. Start pulling the waste and the whole thing can stretch, snap or disappear completely.
It is one of those jobs where you can spend more time trying to rescue a tiny detail than you did designing the whole thing.
And yes, it is particularly annoying when you are working on an order and have to throw away a perfectly good piece of HTV because one tiny letter decided to put up a fight.
Get the Cut Right Before You Start Weeding
A lot of weeding problems are actually cutting problems.
If the vinyl has not been cut cleanly, there is only so much you can do with a weeding tool afterwards.
This is especially important with small designs. A slight inaccuracy that would barely be noticeable on a large logo can completely change the result when you are working with tiny lettering or very fine lines.
That is why the cutter plotter you use matters.
A good machine should be able to follow the design accurately, handle tight corners and curves and maintain a consistent cut across the whole piece. When the cutting is precise, the waste vinyl tends to separate much more cleanly from the parts you want to keep.
You notice the difference most when working on detailed designs.
A tiny gap stays open. A thin line remains intact. Small letters are still recognisable instead of becoming a collection of little vinyl scraps.
This is one reason I would not rush into buying the cheapest cutter plotter available if you know you are going to be producing detailed vinyl designs regularly. Saving a bit on the machine is not much of a saving if you are constantly wasting HTV because the cuts are inconsistent.
Do a Small Test Cut First
I know. Nobody really enjoys doing test cuts.
You just want to get on with the actual job.
But if you are using a new vinyl or trying a particularly detailed design, a small test cut can save you a lot of frustration later.
You are looking for a clean cut through the vinyl without cutting unnecessarily deep into the carrier sheet. If the pressure is too low, parts of the design may stay attached. Too much pressure can make the vinyl harder to weed and may cause other problems.
I would rather spend a couple of minutes testing than discover halfway through a large design that the settings are wrong.
It is especially worthwhile when you are cutting tiny text or fine details. These are usually the first things to show that your settings are not quite right.
Slow Down When You Weed
This is probably the most boring advice, but it works.
When you have a large design, it is tempting to pull the waste vinyl away quickly. With small designs, I find it is much better to slow things down.
Start at a corner and peel the waste back gradually.
If you feel the vinyl resisting, stop.
Don’t just pull harder and hope for the best. That is often how a perfectly good letter ends up attached to the piece of waste in your hand.
Instead, put the vinyl back down and have a look at what is holding it. A fine weeding tool can usually separate the two pieces without too much trouble.
I also find that keeping the waste vinyl fairly low as you peel it, rather than pulling it straight upwards, gives you a little more control. It is a small thing, but it can make delicate sections much easier to manage.
Start With the Bigger Waste
When a design is particularly detailed, I find it easier to remove the obvious waste first.
Clear the larger areas around the design, then work your way towards the small details.
Once the main waste has gone, you can see the design much more clearly. That makes it easier to spot the tiny pieces that need removing from inside letters or between narrow sections.
Trying to pick out every tiny piece from the beginning can quickly become confusing. After a while, everything starts to look like a piece of vinyl you should either keep or remove.
Take it one section at a time.
You will probably enjoy the process a lot more.
Be Careful With Tiny Text
Small lettering is often where things go wrong.
If you are designing the artwork yourself, remember that something can look perfectly readable on a computer screen and still be incredibly difficult to weed in real life.
The smaller the letters become, the less room you have for error.
This is especially true when the font has thin strokes or tight spacing. You may be able to see every letter clearly on your monitor, but once it has been cut into HTV, those small gaps can almost disappear.
If you are creating designs for personalised T-shirts, hoodies or tote bags, it is worth giving small text a little breathing room.
There is no prize for making a design as complicated as possible.
Sometimes, making a line slightly thicker or increasing the spacing between letters will make the whole thing much easier to weed, while the finished product still looks just as good.
If Something Starts Lifting, Stop
This is one I learned through trial and error.
You are peeling away the waste and notice that part of your design is starting to lift with it.
Stop.
Don’t keep pulling in the hope that it will somehow separate itself.
Use your weeding tool to gently push the design back onto the carrier sheet, then work around the problem area. Sometimes approaching it from another direction is all it takes.
If the same section keeps lifting, it is worth looking back at the cutting settings. The blade may not have cut deeply or cleanly enough, or the design itself may simply be too fine for the material.
Trying to fix a cutting problem by becoming increasingly aggressive with your weeding tool rarely ends well.
Don’t Forget the Blade
If your designs suddenly become much harder to weed, have a look at the blade.
A worn blade can cause all sorts of little problems. You might find that some sections cut perfectly while others are only partially cut. On a large design, you may not notice immediately. With tiny lettering, it becomes obvious very quickly.
The same goes for blade depth and cutting pressure.
If you are constantly changing settings because the results are inconsistent, check the condition of the blade before doing anything else.
Sometimes the problem is not your technique.
Sometimes the blade is simply past its best.
Your Cutting Speed Can Affect Tiny Details
When you are working with intricate artwork, there is not always a benefit to cutting as quickly as possible.
Tiny lettering, tight curves and delicate lines require the blade to move through a more complicated path. Slowing things down can sometimes help the machine handle those details more accurately.
The exact settings will depend on your cutter plotter and the vinyl you are using, so there is no universal setting I can give you.
If a detailed design is coming out messy, though, it is worth trying a slower cutting speed and seeing whether the result improves.
It is one of those adjustments that takes a few minutes to test, but can save a lot of time at the weeding table.
A Good Cutter Plotter Can Save You a Lot of Headaches
There is a tendency to think that the weeding stage is entirely down to the person holding the tool.
It isn’t.
The quality of the cut makes a huge difference.
When you are working with tiny designs, your cutter plotter needs to be able to follow the artwork accurately. Small letters, narrow gaps and fine curves all require precise blade movement. If the machine struggles to track the design properly, you may end up with rough edges, closed gaps or sections that have not been cut consistently.
And then you are left trying to sort it out by hand.
A good cutter plotter should give you a clean, consistent cut, particularly when you are working with detailed designs. That does not mean every design will suddenly weed itself, but it can take away a lot of the unnecessary frustration.
This is where I think people sometimes underestimate the importance of the machine. A decent cutter plotter is not just about how quickly it can cut. It is about how accurately it can reproduce what you designed in the first place.
When that part goes well, the weeding process becomes much more predictable.
Don’t Be Afraid to Simplify the Design
Sometimes, the problem is not the machine or the vinyl.
The design is simply too fine.
If you have tried different settings, checked your blade and slowed everything down, but a particular design still keeps breaking, it may be time to go back to the artwork.
Make the lettering slightly larger.
Thicken an ultra-fine line.
Give small elements a little more space.
You might be surprised how little you need to change to make a design significantly easier to weed.
This is particularly useful if you are producing a batch of personalised clothing. If you have to weed the same design twenty or thirty times, a small adjustment that saves even a couple of minutes per item quickly adds up.
A Few Little Things That Help
There are a handful of small habits that I have found useful when working with detailed HTV.
Good lighting is one of them. Tiny pieces of waste are much easier to spot when you can actually see what you are doing.
I also like to keep the carrier sheet flat on the work surface. If the vinyl is moving around while you weed, delicate elements are more likely to shift or lift.
And if I am working on something important, I always try to have enough vinyl for one replacement cut.
Not because I expect to make a mistake, but because mistakes have a funny habit of appearing precisely when you are in a hurry.
Most importantly, don’t feel that you have to finish the entire design in one heroic attempt. If it is a complicated piece, work through it section by section. There is nothing wrong with taking a little longer if it means the design actually survives the process.
Good Weeding Starts Before You Pick Up the Tool
The best weeding technique cannot completely rescue a poor cut.
For small HTV designs, everything works together. The artwork needs to be suitable for the size you are cutting, the vinyl needs to be compatible with the project, and the cutter plotter needs to reproduce the design accurately.
After that, your settings and your weeding technique take over.
I have found that once those things are working together, tiny designs become much less intimidating. You still need patience, but you are no longer fighting against the material and the machine at the same time.
And if you regularly produce detailed vinyl designs, it is worth paying attention to the cutter plotter itself. A reliable machine can make a noticeable difference to cutting accuracy, especially with small lettering, fine lines and intricate artwork.
Signzworld offers a range of cutter plotters for vinyl cutting projects, with options suited to different types of users and workloads. For anyone who spends a lot of time cutting and weeding HTV, having a machine that can produce clean, precise cuts is one of those things you appreciate most when you are sitting down with a particularly fiddly design.