If you have spent any time around sublimation printing, you have probably come across the phrase “preheat your sublimation blank” more times than you can count.
It usually appears as a quick tip buried somewhere in a mug-pressing guide, a Facebook group discussion, or a troubleshooting thread. The advice is often something along the lines of “preheat the blank first”, and then the conversation moves on.
But what does preheating actually do?
Is it something you should be doing every time? Does every sublimation blank benefit from it? And how hot should the blank be before you start the actual transfer?
These are surprisingly common questions, particularly when you are new to sublimation or moving from one type of blank to another.
The short answer is that preheating can be a very useful part of the sublimation process, but it is not a universal rule. Some blanks can benefit considerably from a little extra heat before pressing, while others need a more cautious approach.
It is also worth remembering that the pressing instructions supplied by the blank manufacturer should always take priority. Different coatings, materials and heat presses can behave differently.
With that in mind, here is how I look at preheating after seeing it used across a lot of sublimation jobs, from everyday mugs to heavier, slower-to-heat blanks.
What Does Preheating a Sublimation Blank Actually Do?
At its simplest, preheating means warming the blank before the transfer is applied.
That sounds almost too obvious to need explaining, but there is a good reason for doing it.
When you put a cold, relatively heavy blank straight into a heat press, the heating element has two jobs to do. It needs to bring the blank up to the required temperature while also providing the heat needed for the sublimation transfer itself.
That can be particularly noticeable with materials such as ceramic and stone. They have considerably more thermal mass than a thin polyester garment, so the surface you are trying to print may not heat as quickly or as evenly as the press display suggests.
Preheating gives the blank a head start.
It can help to:
- Reduce cold spots
- Make heat distribution more consistent
- Reduce moisture-related problems
- Improve colour consistency
- Reduce fading in areas that are slower to heat
- Reduce the temperature shock experienced by some ceramic or stone blanks
- Make the actual pressing cycle more predictable
Ink Experts, for example, specifically recommends preheating sublimation mugs. Its current mug pressing guide suggests placing a blank mug in the press for around 30 to 40 seconds before the printed mug is pressed. It explains that this can improve transfer consistency, reduce fading towards the bottom of the mug and reduce the risk associated with a sudden temperature change in the ceramic.
That is quite different from simply saying, “preheat because everyone does it.”
There is an actual reason behind the step.
Which Sublimation Blanks Are Worth Preheating?
Not every blank needs the same treatment. In my experience, preheating is most useful when the material is relatively thick, holds heat differently across its surface, contains moisture, or is particularly prone to cold spots.
Here are four common situations where it is worth considering.
1. Ceramic Sublimation Mugs
Ceramic mugs are probably the best-known example.
A mug can look perfectly uniform from the outside, but it does not heat uniformly as quickly as a thin metal sheet. The base is particularly interesting because there is more ceramic there, and that extra mass can take longer to reach the required temperature.
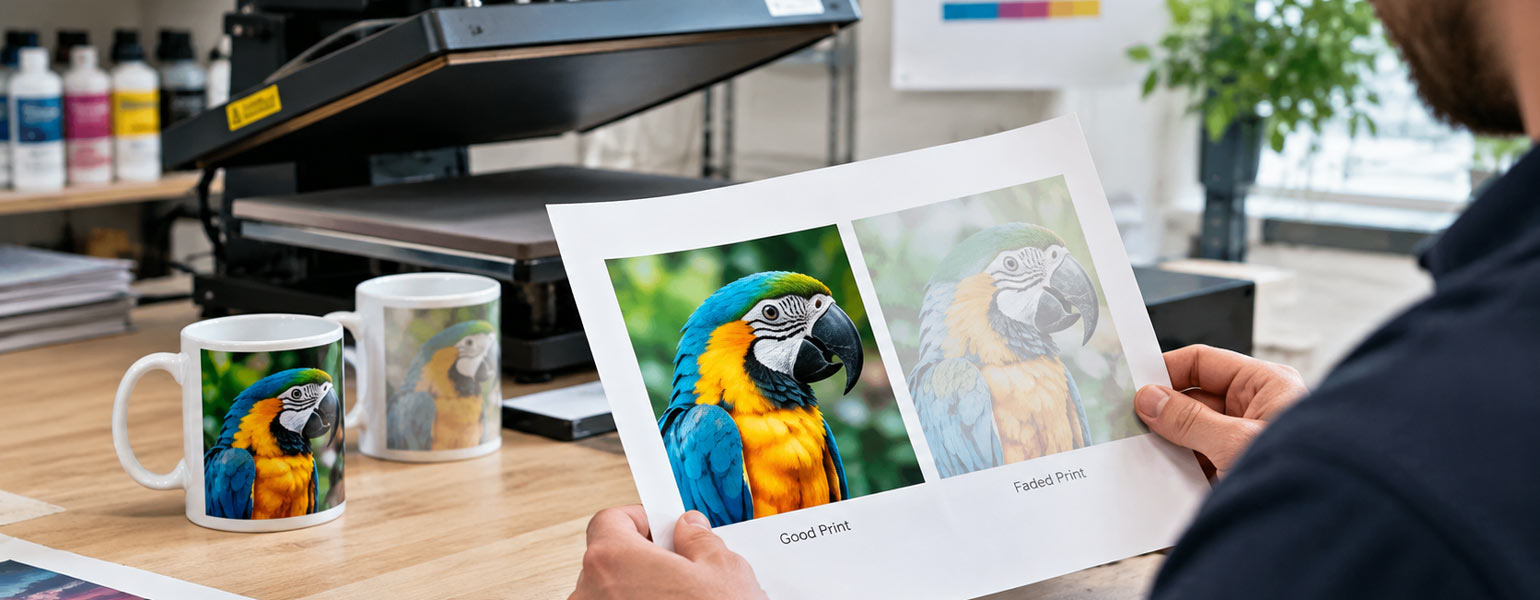
This is one reason you can occasionally get a print that looks great around most of the mug but becomes noticeably lighter towards the bottom.
How to preheat a sublimation mug
A practical starting point is:
Temperature: 180°C
Preheat time: around 30–40 seconds
Pressure: light to medium, depending on the press
Ink Experts uses a similar method, recommending that a blank mug is preheated in the mug press for approximately 30–40 seconds at a press temperature of 180°C before the printed mug is put into the machine. Its standard mug pressing recommendation is 180°C for 180 seconds with medium pressure, although the exact pressing conditions can vary with the equipment and blank.
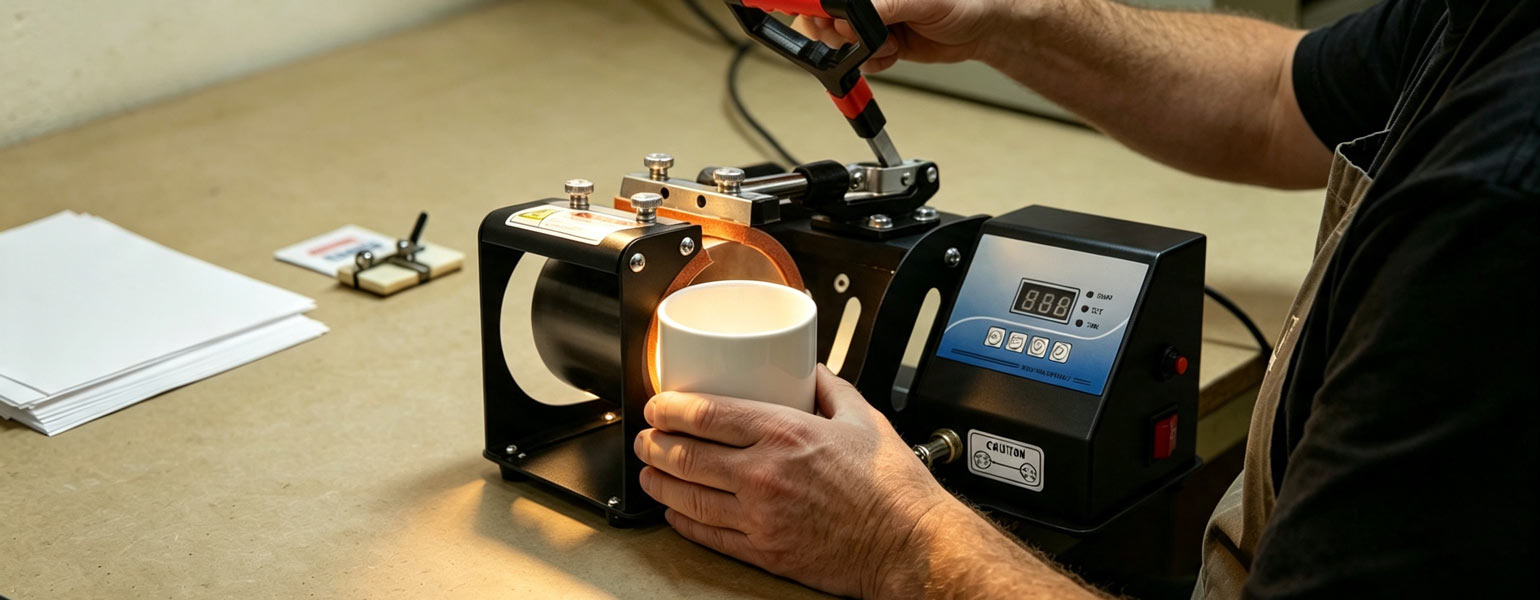
One useful trick is to let the blank mug warm in the press while the machine is coming up to temperature. Once the press reaches its working temperature, remove the blank, quickly apply the transfer to the warmed mug and begin the proper pressing cycle.
Don’t leave the transfer paper sitting against a hot mug while you take your time lining everything up. That is asking for trouble.
Ghosting is one of those sublimation problems that can appear when the paper or design moves, and a little extra care during the transfer setup is just as important as the preheating itself.
What difference can it make?
Imagine you have just pressed 20 identical white mugs.
The first 15 look brilliant. The colours are strong, and the artwork is nice and even.
But the lower section of the remaining mugs looks slightly washed out.
Before changing your ink profile, increasing the pressing temperature or blaming the paper, try asking a simpler question:
Is the mug actually getting hot enough, evenly enough?
Preheating can help bring the ceramic closer to the required temperature before the actual transfer begins. This is one of the reasons it can be particularly useful when you are working with thicker mugs or a press that does not distribute heat perfectly.
And yes, sometimes the boring little step you nearly skipped is the one that fixes the problem.
2. Sublimation Rock Slate
Rock slate is another blank where preheating can make a noticeable difference.
Slate is dense, relatively thick and not especially quick to heat through. If you press a cold piece of slate, the surface may reach the target temperature much sooner than the rest of the material.
That can create cold spots and inconsistent transfer.
Ink Experts specifically recommends preheating sublimation rock slate and currently advises placing the blank under the heat press for around 30 seconds at 200°C. Its pressing guide then uses 200°C for a substantially longer pressing cycle because of the thickness of the material.
A practical starting point for slate
Temperature: 200°C
Preheat time: around 30 seconds
Pressure: light pressure during preheating
After that, apply your printed transfer and follow the recommended pressing profile for your particular slate.
The important point here is that 30 seconds of preheating does not mean the slate is suddenly at 200°C throughout.
It simply gives the material a head start.
That distinction matters.
The temperature displayed on your heat press is the temperature of the heating element or platen, not necessarily the temperature at the centre of the blank. Thick materials take time to catch up.
3. Ceramic Tiles and Other Thick Ceramic Blanks
Ceramic tiles behave in much the same way as mugs, although the shape of the blank obviously changes how heat moves through it.
A tile can be cold in the middle while the surface nearest the platen is already getting very hot.
For a typical ceramic sublimation tile, a sensible starting point for testing is around:
Temperature: 180–200°C
Preheat time: around 20–30 seconds
The exact temperature should come from the blank supplier’s pressing instructions. If no instructions are available, start conservatively and test a spare blank rather than committing an important customer order to an untested setting.
With tiles, preheating can be particularly useful when you are seeing:
- Uneven colour across the image
- A paler centre
- Fading towards certain edges
- Inconsistent results from one tile to the next
- Signs that the blank is not reaching temperature evenly
There is another reason to be careful with ceramic.
Rapid changes in temperature can place stress on the material. This is one of the reasons preheating is recommended for ceramic mugs and slate by Ink Experts rather than simply putting a cold blank straight into a fully heated press.
If you are working with an expensive ceramic blank, testing your process first is much cheaper than discovering a cracking problem halfway through a production run.
4. Polyester Fabric and Garments
This one is slightly different.
With polyester fabric, you are generally not trying to warm a large, heavy object in the same way you are with ceramic. Instead, a short pre-press is often used to remove moisture and flatten the fabric before applying the transfer.
A common starting point is:
Temperature: around 180–190°C
Time: around 3–5 seconds
Pressure: light
The key word here is starting point.
Fabric type, thickness, moisture level and the manufacturer’s instructions all matter. You should not automatically press every polyester garment at 190°C simply because another shirt worked at that setting.
For garments, the purpose of the short pre-press is often less about getting the whole substrate hot and more about preparing the material for a cleaner, more predictable transfer.
This can be especially useful if the garment has been stored somewhere humid or has picked up moisture during handling.
Preheating Can Help With Moisture Too
Moisture is one of those things that can quietly ruin an otherwise good sublimation job.
You might have the correct ink, good sublimation paper and a perfectly calibrated heat press, yet still end up with a print that looks hazy, uneven or slightly distorted.
A short pre-press can help drive moisture out of some materials before the transfer takes place.
This is particularly relevant for polyester fabrics and certain blanks that have been stored in humid conditions.
But there is an important distinction here:
Preheating is not a magic moisture-removal button.
If a blank has been exposed to significant humidity, leaving it in a hot press for another 30 seconds is not necessarily the answer. Proper storage, a dry working environment and allowing materials to acclimatise can be just as important.
A Real-World Example: The Mug That Looked Different at the Bottom
One of the more frustrating sublimation problems is the mug that looks almost perfect until you look closely at the bottom of the design.
The top half is rich and vibrant.
The lower section is noticeably lighter.
At first glance, it is tempting to blame the ink. Then perhaps the paper. Then maybe the colour profile.
But if the same artwork, paper and settings consistently produce a weaker area in the same part of the mug, heat distribution should be on the list of suspects.
The lower part of the mug contains more ceramic mass and can take longer to heat. If the blank starts cold, the press is spending part of the cycle bringing the ceramic up to temperature rather than maintaining an even transfer temperature across the whole printable area.
A short preheat before applying the transfer can reduce that temperature gap.
It is not guaranteed to fix every fading problem, because pressure, mug shape, heating element condition, coating quality and pressing time can all play a role. But it is a simple variable to test before completely changing your workflow.
That is really what good sublimation troubleshooting is about.
Change one thing at a time.
Otherwise, you end up changing the temperature, time, pressure, paper and blank simultaneously and have absolutely no idea which change actually worked.
When You Should Be More Careful With Preheating
This is where the advice becomes more interesting.
There is a tendency in sublimation communities to turn useful tips into absolute rules.
“Always preheat.”
“Always press at 200°C.”
“Always pre-press for 10 seconds.”
Real sublimation is rarely that tidy.
When the blank manufacturer does not recommend it
Start with the manufacturer’s instructions.
If the supplier gives you a specific pressing profile and does not mention preheating, don’t automatically add an extra heating stage to every job.
A blank’s coating is designed to work within a particular temperature and time window. Adding unnecessary heat can potentially affect the surface finish or create other problems.
When the blank heats very quickly
Thin aluminium panels and some other lightweight blanks can reach temperature much faster than thick ceramic or slate.
In those cases, a long preheat may add very little benefit.
You can end up putting unnecessary heat into the coating before the actual transfer has even started.
When ghosting is already a problem
This one catches people out.
If your print is moving during pressing, preheating the blank does not solve the underlying problem.
The paper still needs to be held securely with suitable heat-resistant tape, and the blank needs to remain stable during the press cycle.
In some workflows, handling a very hot blank between preheating and applying the transfer can actually make positioning more awkward.
If your design is moving, fix the movement first.
When the blank has a temperature-sensitive coating
Not every sublimation coating behaves identically.
Some coated products have a relatively narrow working window. If you are unsure, check the supplier’s recommended temperature and pressing instructions before introducing a separate preheat stage.
This is particularly important with specialist blanks, coated metals and products that are not designed for conventional flat-press temperatures.
Preheating Is Not a Substitute for a Good Heat Press
This is worth saying because it is easy to fall into the trap of using preheating as a cure-all.
If one side of your heat press is substantially hotter than the other, preheating the blank will not magically make the platen uniform.
Likewise, preheating will not fix:
- Incorrect pressure
- Poor contact between the blank and platen
- A damaged heating element
- Incorrect temperature calibration
- A poor-quality sublimation coating
- Incorrect pressing time
- A design that has moved during pressing
- Incorrect colour management
- Poor-quality sublimation paper or ink
In other words, preheating is a process adjustment, not a replacement for proper equipment and good technique.
So, Should You Preheat Your Sublimation Blanks?
If you are working with a thick ceramic, slate or another blank that takes time to heat evenly, I would certainly consider it.
For mugs, a short preheat can be particularly useful. Ink Experts currently recommends around 30–40 seconds at 180°C for its mug workflow, while its rock slate guide recommends around 30 seconds at 200°C before the main pressing cycle.
For polyester garments, a brief pre-press can be useful for moisture and fabric preparation.
For thinner, fast-heating blanks, however, there may be little reason to add another heating stage unless testing shows a benefit.
And that is probably the best way to approach preheating in general:
Don’t treat it as a ritual. Treat it as a tool.
If preheating gives you more even colour, fewer cold spots, better moisture control or more consistent results, keep it in your workflow.
If it makes no measurable difference, there is no prize for doing an extra step just because someone on a forum said you should.
A Simple Preheating Checklist
Before starting a new type of sublimation blank, ask yourself:
1. What is the material?
Ceramic, slate, polyester fabric, aluminium and coated specialist blanks all respond differently to heat.
2. Does the supplier recommend preheating?
If they do, follow their temperature and timing guidance first.
3. Is the blank thick or slow to heat?
If so, preheating may be particularly useful.
4. Could moisture be part of the problem?
If the material has been stored somewhere humid, a short pre-press may help.
5. Are you testing before production?
Always test an unfamiliar blank before using it for a customer order.
6. Are you changing one variable at a time?
If the print is poor, don’t change everything at once. Test preheating separately from temperature, time and pressure.
The Bottom Line for Sublimation Beginners
Preheating sublimation blanks is one of those techniques that sounds much more complicated than it actually is.
The basic idea is simple: give the blank a little time to warm up before asking it to complete the sublimation transfer.
For some materials, particularly ceramic mugs and rock slate, that extra preparation can make a noticeable difference. It can help reduce cold spots, improve consistency and avoid some of the temperature-related problems that appear when a cold, dense blank goes straight into a hot press.
But there is no universal “preheat everything” rule.
A 30-second preheat can make sense for a thick slate blank. A short pre-press can be useful for a polyester garment. A mug may benefit from warming before the transfer is applied. A thin coated blank may not need the extra step at all.
The more sublimation work you do, the more you start to notice that good results often come down to these small details.
Not the flashy stuff.
Not another 20-page colour guide.
Just understanding what the material is doing when you put it under heat.
Choosing the Right Sublimation Blanks
Once you have a reliable pressing process, the quality and consistency of the blank itself become just as important.
Signzworld offers a range of sublimation mugs, sublimation blanks and heat press equipment for UK makers, small businesses and anyone producing personalised products at home or in a professional setting. Whether you are pressing a batch of mugs for an Etsy order or experimenting with your first set of sublimation blanks, choosing a suitable blank and following its recommended pressing profile is the best place to start.